The Zero Escape trilogy is my favorite video game series. To be clear, I’m not claiming it’s the best, but merely my favorite. Its escape rooms can be hit-or-miss, but the stories in each game have kept me up to 3am many nights as I tried to unravel their intricate storylines.
What’s so great about their plots? Well, unfortunately, telling you would be a huge spoiler! I can say this: each game pushes the boundaries of story-telling within the visual novel format just a little further.
Unfortunately, there are a few questionable design decisions with the latest game, Zero Time Dilemma, which can block players’ progress through the game. Most of them could have been solved with a better hinting system, not only within the escape rooms, but also in how to progress the story itself. Normally such problems can be solved by checking Google for answers, but in a game like ZTD, it’s very easy to run across spoilers which will detract from the player’s experience for a first playthrough.
My goal for this post is to provide first-time players a guide to push them in the correct direction, without any risk of spoilers. It should be referred to sparingly, and only when the player feels she does not know how to proceed in furthering the story.
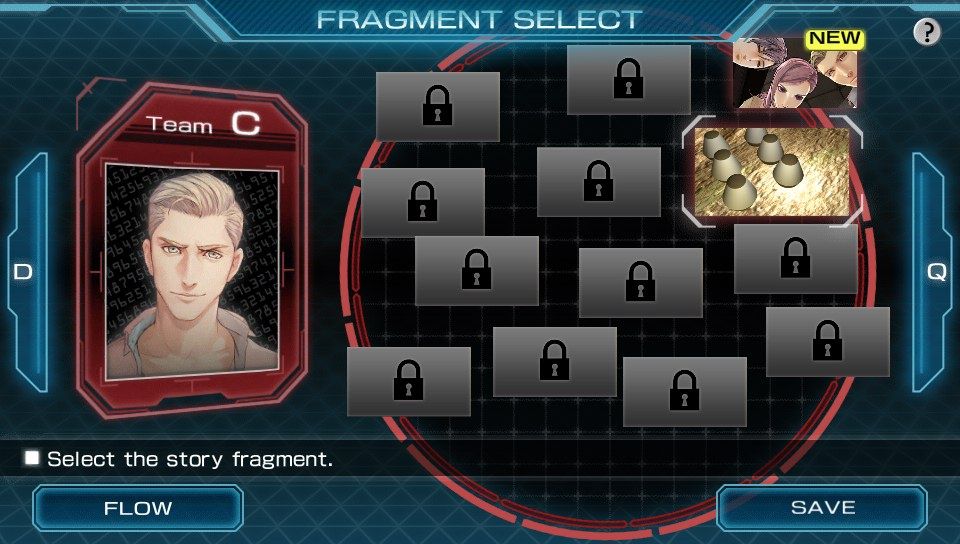
To emulate the loss of the characters’ memories, gameplay is fragmented into
several sections.
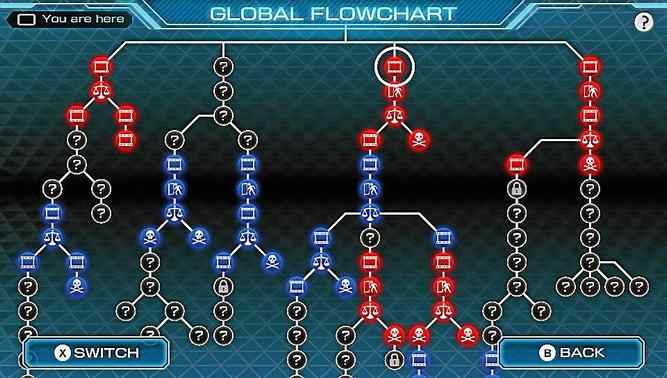
As more of the story is revealed, the fragmented storylines are positioned
within a branching timeline, based upon the choices of the characters.
When it is unclear how to progress the story, the player either has to make a new Decision (marked with a balance scale on the flowchart), or needs to complete a Quest (often, escape a room; marked with a door on the flowchart). Searching online for Quest walkthroughs is easy enough, and has little risk for spoilers, so I’ll be focusing on the several Decision games. Here’s an example:
- Read Spoiler? (example)
- Outcome 1
- Prerequisite: CQD-END:2
- Hint 1: Think about this Decision’s title.
- Hint 2: Well, you aren’t going to WRITE it.
- Choice: “READ”
- Outcome 2
- Prerequisite: none
- Choice: “DONT”, or let time expire
- Outcome 1
The outcomes are numbered as they appear left-to-right on the fragment and global flowcharts, not necessarily in the order they should be played. The given prerequisites are not enforced by the game; however, unless you’ve fulfilled them, then you shouldn’t expect to know how to make that choice at that point of the game (and should try doing something else for now). Here’s my suggestions before using this guide:
- Play any Fragments marked New.
- Play any nodes of the Global Flowchart marked with an exclamation point.
- Read my Note on Execution Voting for an explanation on how to get all the Execution Results.
- Look for a Decision you are missing outcomes for on the Global Flowchart in the below list. If you have satisfied its prerequisites, then peek at its hints. If you give up, read its choice and move on.
Shoot me feedback on the Reddit post here. Thanks to /u/mythriz for pointing out a potential spoiler in that thread.
Time to Decide!
Decisions are ordered alphabetically in this list.
- 3-Way Standoff
- Outcome 1
- Prerequisites: none
- Hint: What two people are involved in the standoff with the child?
- Choice: “ERIC”.
- Outcome 2
- Prerequisites: none
- Hint: What two people are involved in the standoff with the child?
- Choice: “MIRA”.
- Outcome 3
- Prerequisites: none
- Hint: Violence isn’t always the answer.
- Choice: “NO ONE”.
- Outcome 4
- Prerequisites: C-END:1, D-END:2, or Q-END:2.
- Hint 1: Start by trying any names you can think of from elsewhere in the game.
- Hint 2: “MYSELF” fails - you cannot commit suicide. Who else is there?
- Hint 3: If you’ve seen C-END:1, try to complete the anagram.
- Hint 4: Consider attacking the character named in D-END:2 or Q-END:2.
- Choice: “DELTA”.
- Outcome 1
- AB Game
- Outcome 1
- Prerequisites: none
- Choice: “ALLY”.
- Outcome 2
- Prerequisites: “Ally” and “Betray” gameovers.
- Choice: Automatic once prerequisites are satisfied.
- Outcome 3
- Prerequisites: none
- Choice: “BETRAY”.
- Outcome 1
- “Don’t Press” Button
- Outcome 1
- Prerequisites: none
- Choice: Let time expire.
- Outcome 2
- Prerequisites: none
- Choice: Press the button.
- Outcome 1
- Door of Truth
- Outcome
- Prerequisites: D-END:2 and Yellow Door (Q-Team Cinema)
- Hint 1: You’ve seen a hint on the other side of the door during Yellow Door (Q-Team Cinema)
- Hint 2: You saw the birth of two babies leading up to D-END:2.
- Choice: “11162029” (for 11/16/2029).
- Outcome
- Dream or Reality
- Outcome 1
- Prerequisites: none
- Choice: Let time expire.
- Outcome 2
- Prerequisites: none
- Choice: Press the button.
- Outcome 1
- Execution Vote: C/Q/D
- See Note on Execution Voting below.
- Final Decision
- Outcome 1
- Prerequisites: none
- Choice: “DON’T SHIFT” or let time expire.
- Outcome 2
- Prerequisites: none
- Choice: “SHIFT”.
- Outcome 1
- Find the Mask
- Outcome 1
- Prerequisites: none
- Hint 1: Think about the Monty Hall problem.
- Hint 2: You have only a 10% chance of choosing the correct locker without any added information.
- Choice: The initial choice is irrelevant, but you have a 90% chance of getting this Correct outcome if you switch.
- Outcome 2
- Prerequisites: none
- Hint 1: Think about the Monty Hall problem.
- Hint 2: You have only a 10% chance of choosing the correct locker without any added information.
- Choice: The initial choice is irrelevant, but you have a 90% chance of getting this Incorrect outcome if you don’t switch.
- Outcome 1
- Force Quit Box: C
- Outcome
- Prerequisites: C-END:1
- Hint 1: Recall the “spell to open Pandora’s box”.
- Hint 2: Zero tells you this Latin phrase, which means “live for today”.
- Choice: “VIVEHODIE”
- Outcome
- Force Quit Box: D
- Outcome
- Prerequisites: strong recollection of Virtue’s Last Reward or Gun vs Incinerator Outcome 3 plus some recollection of VLR or D-END:2
- Hint 1: If you remember the events of Virtue’s Last Reward, you may be able to figure this out. Neither item belongs to Sigma, so…
- Hint 2: For the first item, recall Diana’s memory of Phi from D-COM, a few days before the events of the game. For the second you’ll need a certain ending from this game, or Luna’s ending from VLR.
- Hint 3: What items were sent along in a transporter?
- Choice: “BROOCH” & “BLUE BIRD”/”MUSIC BOX”
- Outcome
- Force Quit Box: Q
- Outcome
- Prerequisites: Q-END:2
- Hint: Zero reveals the code to this panel in another timeline.
- Choice: “38080832”
- Outcome
- Gift from Gab
- Outcome 1
- Prerequisites: none
- Choice: “DRINK”.
- Outcome 2
- Prerequisites: none
- Choice: “DON’T DRINK”.
- Outcome 1
- Gun vs Incinerator
- Outcome 1
- Prerequisites: none
- Choice: Shoot the gun. This outcome occurs 50% of the time.
- Outcome 2
- Prerequisites: none
- Choice: Shoot the gun. This outcome occurs 50% of the time.
- Outcome 3
- Prerequisites: none
- Choice: Let time expire.
- Outcome 1
- Heads or Tails
- Outcome 1
- Prerequisites: CDQ-END:1
- Choice: Irrelevant. Always triggers after fulfilling prerequisite, then 50% afterwards.
- Outcome 2
- Prerequisites: none
- Choice: Irrelevant. Always triggers before Outcome 1’s prerequisite, then 50% afterwards.
- Outcome 1
- Helmet Code
- Outcome
- Prerequisites: Reality (Bad end)
- Hint: Zero reveals the code to the helmet in another timeline.
- Choice: “61404091”
- Outcome
- Inject Radical-6?
- Outcome 1
- Prerequisites: none
- Choice: “INJECT RADICAL-6”
- Outcome 2
- Prerequisites: none
- Choice: “DON’T INJECT”
- Outcome 1
- Kill Button: C/Q/D
- Outcome 1
- Prerequisites: none
- Choice: Let time expire.
- Outcome 2
- Prerequisites: none
- Choice: Press the button.
- Outcome 1
- The Antidote Is?
- Outcome 1
- Prerequisites: none
- Hint 1: The antidote can be uniquely determined by considering which characters’ tounges are numb.
- Hint 2: Akane numbered the eight vials A=0 through H=7, and converted them to binary, 000 through 111. Carlos tested the vial if the first binary digit was 1, Junpei tested the vial if the second binary digit was 1, and Akane tested the vial if the last binary digit was 1.
- Hint 3: Match the tasting results with the background image in the Decision. Carlos took the top row, Junpei took the second row, and Akane took the final row. Or, read the Log carefully and use logic to deduce the solution.
- Choice: Choose correctly using the above hints.
- Outcome 2
- Prerequisites: none
- Choice: Choose incorrectly, which occurs with 87.5% likelihood when selecting randomly anyway.
- Outcome 1
- The Bomb
- Outcome 1
- Prerequisites: none
- Choice: “RUN AWAY”.
- Outcome 2
- Prerequisites: none
- Choice: “DON’T RUN”.
- Outcome 1
- The Three Dice
- Outcome 1
- Prerequisites: none
- Hint: There’s nothing you can do/learn to improve your odds, but the game is gracious enough to cheat in your favor.
- Choice: Keep rolling the dice. The game will always give it to you on your third attempt. (If it didn’t, you would have to roll the dice 150 times just for a 50% chance at victory!!)
- Outcome 2
- Prerequisites: none
- Choice: Just roll the dice. It is the 99.537% reality, after all.
- Outcome 1
- Transporter
- Outcome 1
- Prerequisites: none
- Choice: “DON’T TRANSPORT”.
- Outcome 2
- Prerequisites: none
- Choice: “TRANSPORT”.
- Outcome 1
- Who Killed Junpei?
- Outcome 1
- Prerequisites: none
- Hint: Who is the biggest danger to Carlos right now?
- Choice: “AKANE”.
- Outcome 2
- Prerequisites: none
- Hint: In this timeline, Carlos seemed shocked that he voted for Q-Team instead of D-Team.
- Choice: “CARLOS”.
- Outcome 1
- Who Killed Mira?
- Outcome 1
- Prerequisites: none
- Hint: Even if you knew, Eric’s not exactly interested in hearing it.
- Choice: Let time expire, “DONNO”, or “I DONT KNOW”.
- Outcome 2
- Prerequisites: none
- Choice: Almost anything, including gibberish. However, you’ll get some interesting unique reactions if you try various names from the game.
- Outcome 1
- You are Zero!
- Outcome 1
- Prerequisites: none
- Choice: Almost anything, including gibberish. However, you’ll get some unique reactions if you try names of characters you can see in the room with you.
- Outcome 2
- Prerequisites: C-END:1 or D-END:2.
- Hint 1: If you’ve seen C-END:1, try to complete the anagram..
- Hint 2: If you’ve seen D-END:2, you’ve seen this person in this room before..
- Choice: “DELTA”.
- Outcome 1
Note on Execution Voting
My biggest peeve with Zero Time Dilemma is the lack of clarity in how to trigger the different Execution Results. You may reasonably think that as soon as your flowchart contains the appropriate Decisions to execute another team, the game should recognize that execution.
But nope. Instead, the game secretly stores the latest Decisions you made for each team in Execution Vote: C/Q/D. So, you need to be careful of the order you make your Decisions, or go back and redo all three each time. For your convenience, here’s one of the quickest ways you can trigger all four Election Results:
- C votes for D
- D votes for Q
- Q votes for C
- All Teams Survived
- C votes for Q
- Q-Team Executed
- D votes for C
- C-Team Executed
- Q votes for D
- C votes for D
- D-Team Executed